¶ Importing and processing images in Digitizer
Video: https://www.youtube.com/watch?v=hl260CqpR2E
¶ Using the standard grid mat (Print file for the grid can be downloaded in Padsystem Cloud, each square is 2"x2")
-
Place the grid mat on the floor
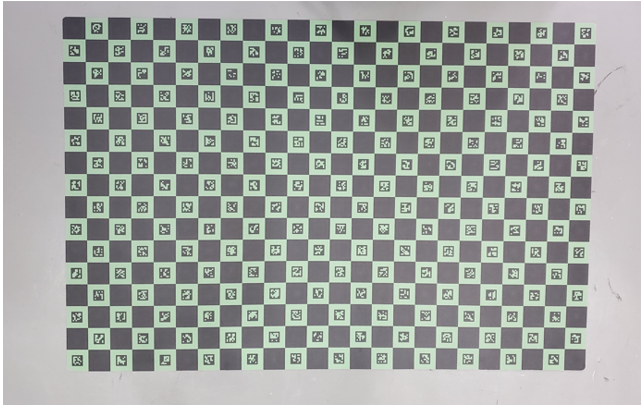
-
Place the pattern (one piece at a time) onto the grid, do not place the piece too close to the edge. (Keep at least 5 mm from the edge)
.jpg)
-
Take a photo with a camera or a smart phone
-
Upload the photo onto the computer
-
Create a new Digitizer work file on Padsystem Cloud
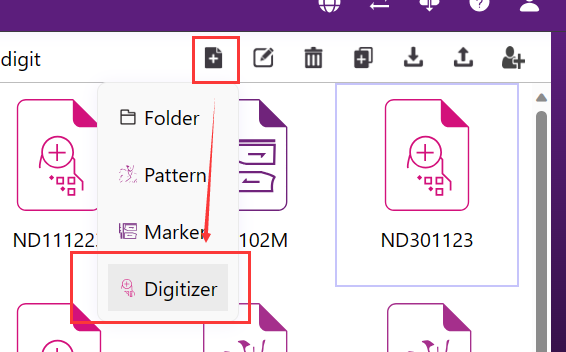
-
Input the name of the file

-
Open the newly created file, select “add photo” to upload the photo file into the program。
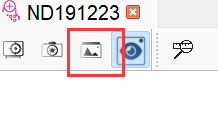
-
Select the photo from your computer and select Visual Comparison. The picture will appear on the left side of the screen with a red box. The dimension of the box is displayed on the side as follows:
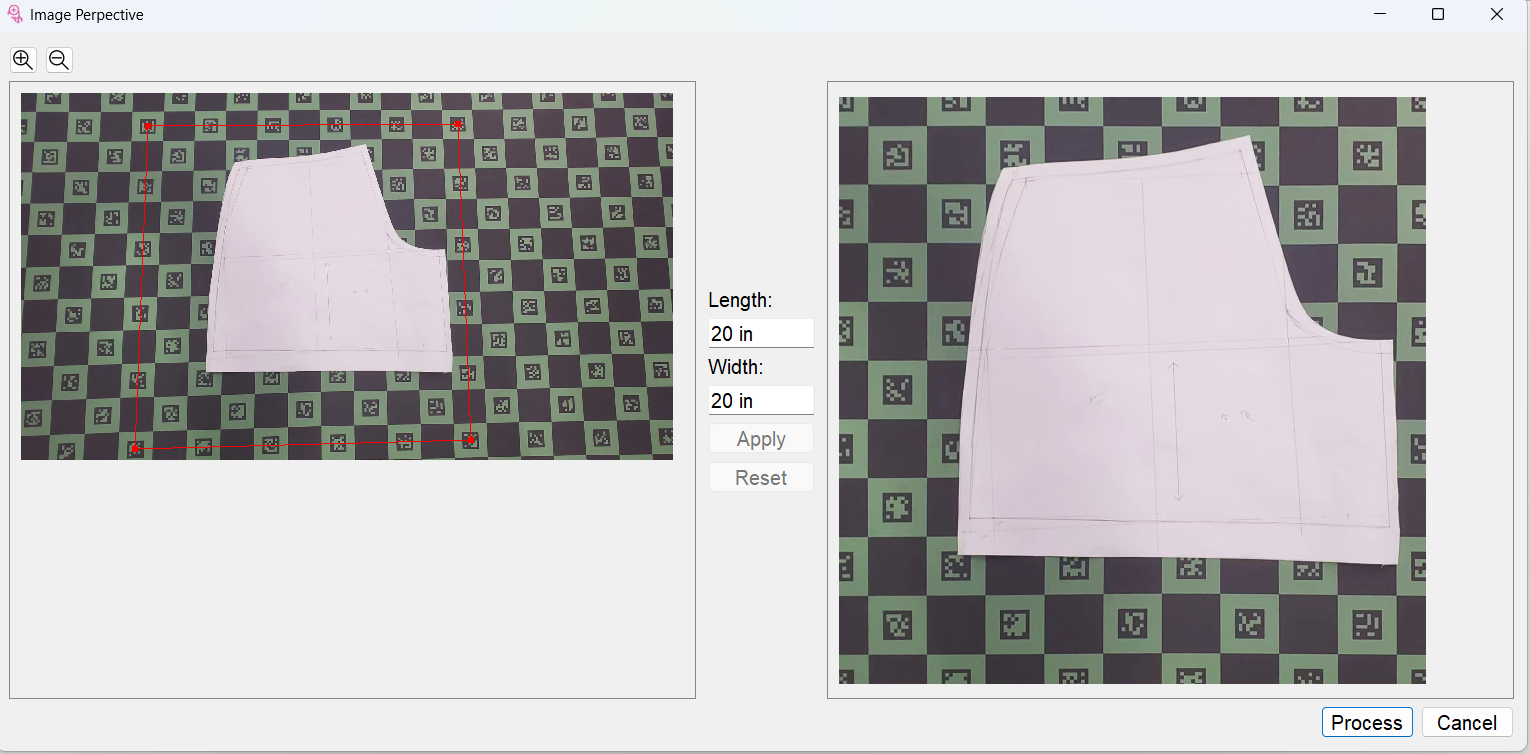
*Scenario 1: If the image can be correctly recognised and the red box frames the pattern then the pattern image will appear on the right. Confirm that the length and width of the red box is correct then click “Proceed”. If the dimensions of the box is incorrect, it is possible to manually input the dimensions and then click “Proceed”.
*Scenario 2: If the red box does not fit around the pattern correctly, use the Arrow tool to move the red dots in the corner to form a rectangle around the pattern. Then count the number of squares (each square is 2”x2”) and enter the length and width of the red box manually.
-Click "Reset" to reposition the red box,
-Note that the length and with of the red box must correspond accurately to the actual size of the pattern for the best accuracy. -
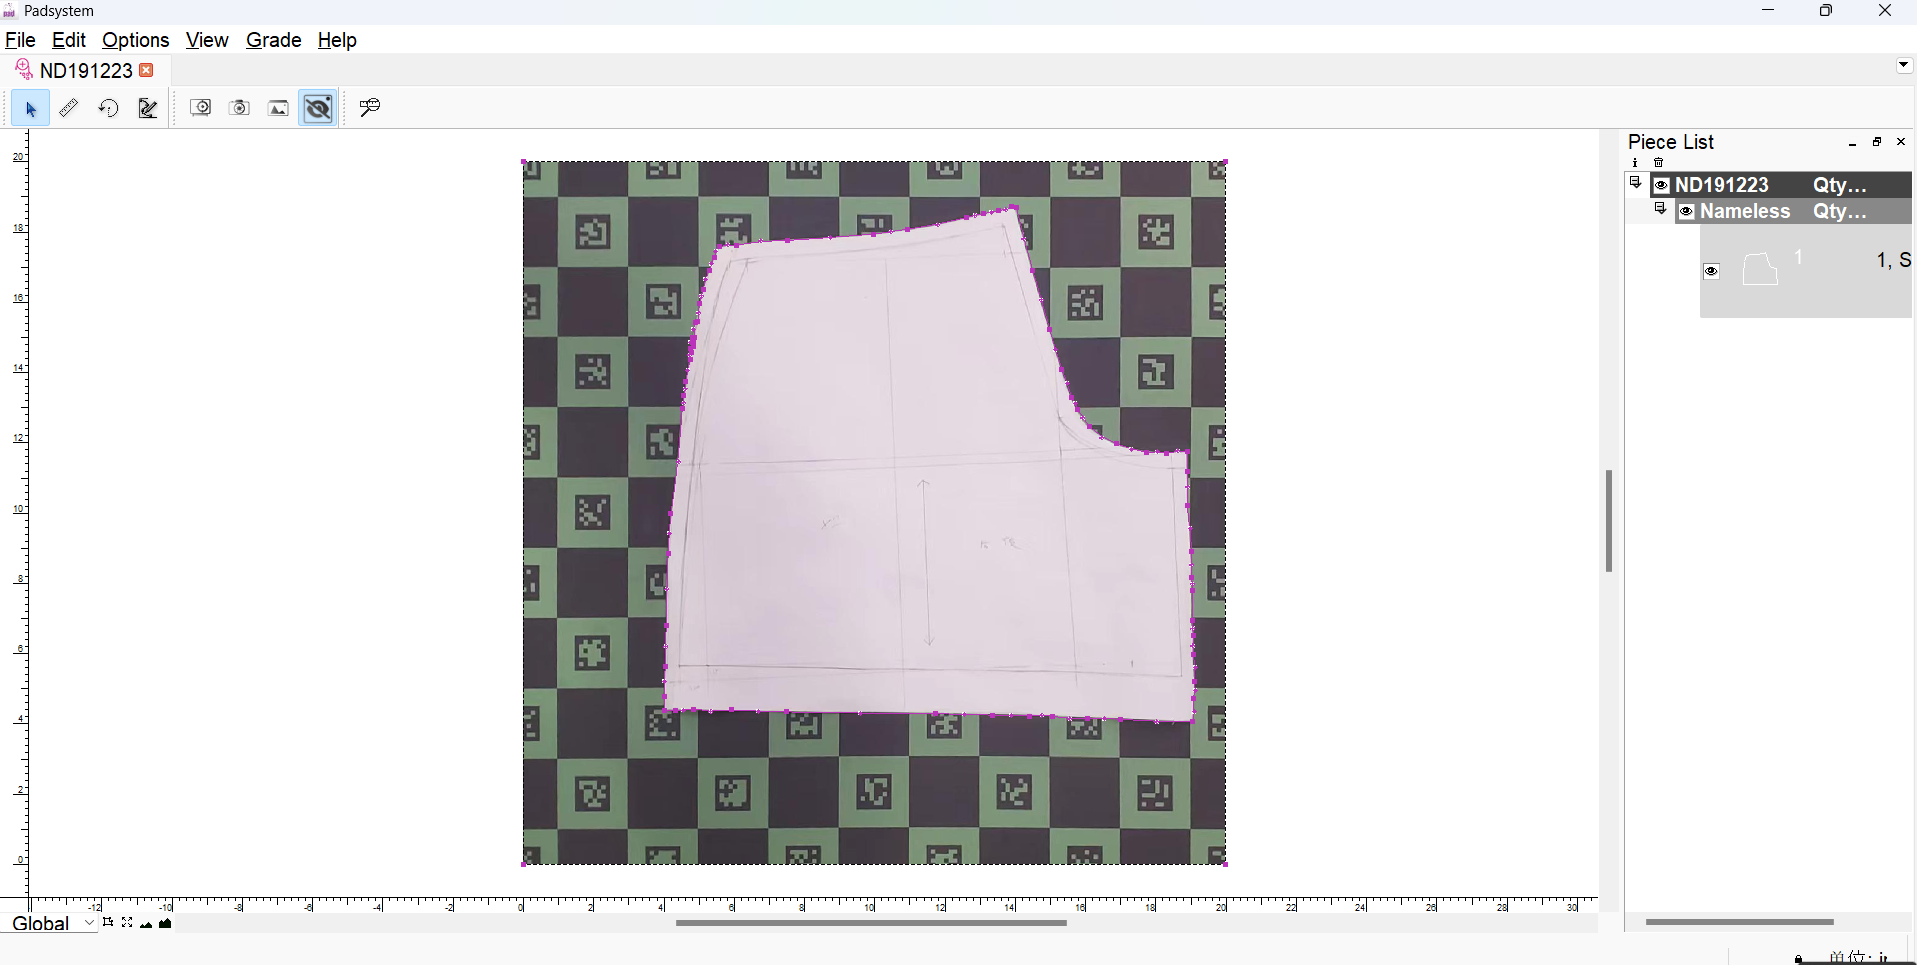
After pressing “Proceed” wait a few seconds. The pattern and the photographed image will be displayed on the work surface and you can then use the Smart Curve tool to follow the image and create a digitized version of the pattern.
-More about the “Smart Line” tool please check the link below:
https://www.padsystem.com/tc/assets/documents/tc/html/pattern/pattern_release_note_v7sc_detail.html#image2
- To save the file once digitizing is complete:
In Menu: (File > Save) - Then, open the saved file and use the Copy function to place the pattern in to a pattern work file to begin resizing, and post processing.
In Digitizer Menu: (Edit> Copy)
In Pattern Menu: (Edit> Place)
-Please Note:
*It is recommended for you to delete the pictures that no longer in use before saving the file to minimise the saving time and speed of opening the file next time.
Press backspace in Win and Delete in MAC after selecting the picture to delete.